Installing CenterScape on Windows
With either the Windows distribution that includes the JRE or the one that uses a locally installed JRE. The install file will have a format as follows:
rfcode-centerscape-1.8.1e-AS_NO_RFC_JRE_20240506_124246_P-setup.exe
“1.8.1” is the software version. “e” indicated that it includes edge software. CenterScape without edge software will have the “e” omitted. “NO_RFC_JRE” indicated that the software does not include the Java runtime environment and that it must be installed prior to the installation of CenterScape. “20240506_124246_P” is the build ID which corresponds to the time and date that the software was compiled. Note that the .exe extension indicated that it is for Windows. For the following install the file rfcode-centerscape-1.8.1-AS_NO_RFC_JRE_20240506_124246_P-setup.exe will be used which is CenterScape for Windows without edge or Java.
Note: Verify that you have the correct installer before proceeding.
Install Java if Using the NO_RFC_JRE distribution
RF Code support Open JDK and the Oracle JRE distributions of Java 17. Other distributions may work splendidly but are not tested by RF Code. If Java related problems are encountered RF Code support may require the Open JDK or Oracle JRE to be installed to determine if the problem will be addressed by RF Code.
Running the Windows Installer
- Double Click on the Windows Installer.
- Choose the Destination Directory
- Choose the Data Manager and Local Zone Manager
Note: The Local Zone Manager is chosen when deploying a second Zone Manager to an existing CenterScape on a different host than the CenterScape Server.
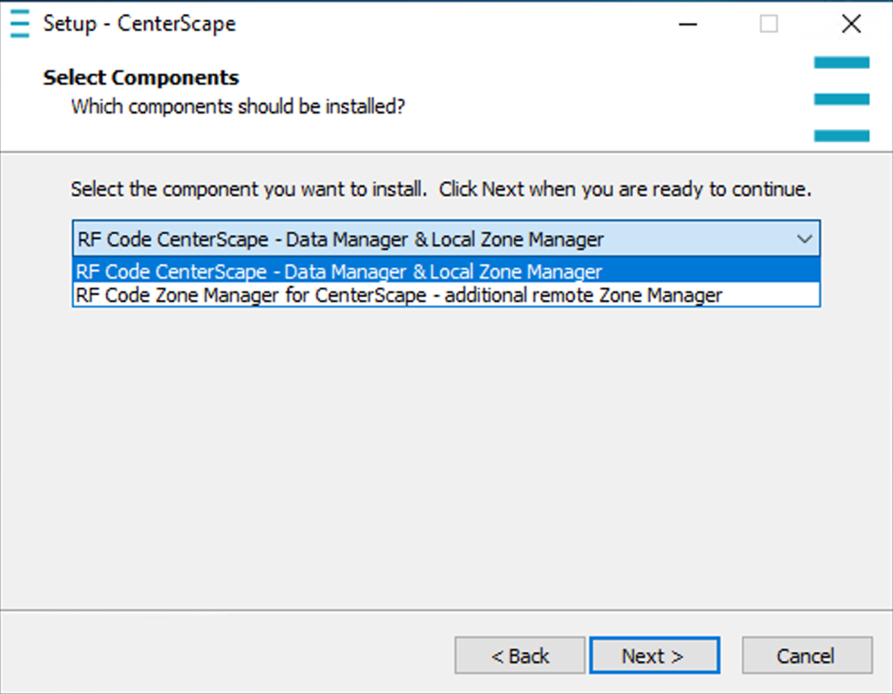
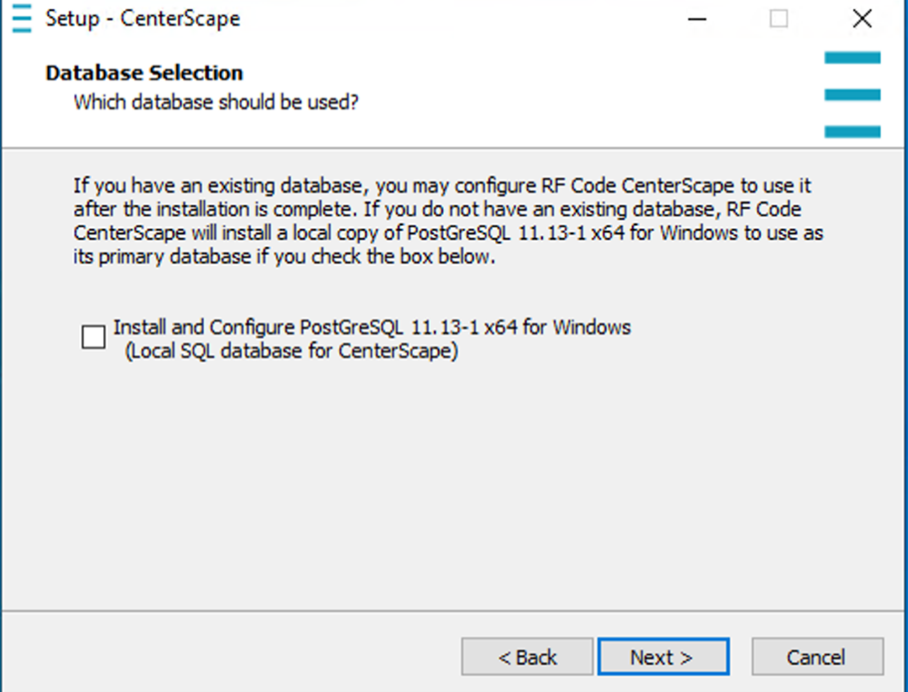
- An option will appear to install PostgreSQL. Use this option if you wish to install Postgres on Windows. This option should be used for small deployments or proof of concept installs. In this install example Postgres is not installed.
- Choose where to install the shortcuts. These are just hyperlinks to the Web UI on localhost.
- The Installer will prompt to connect to the web service. This will not work properly on Windows Servers that use Internet Explorer as the default web browser. On pre-2022 Windows Server install Microsoft Edge or Chrome.
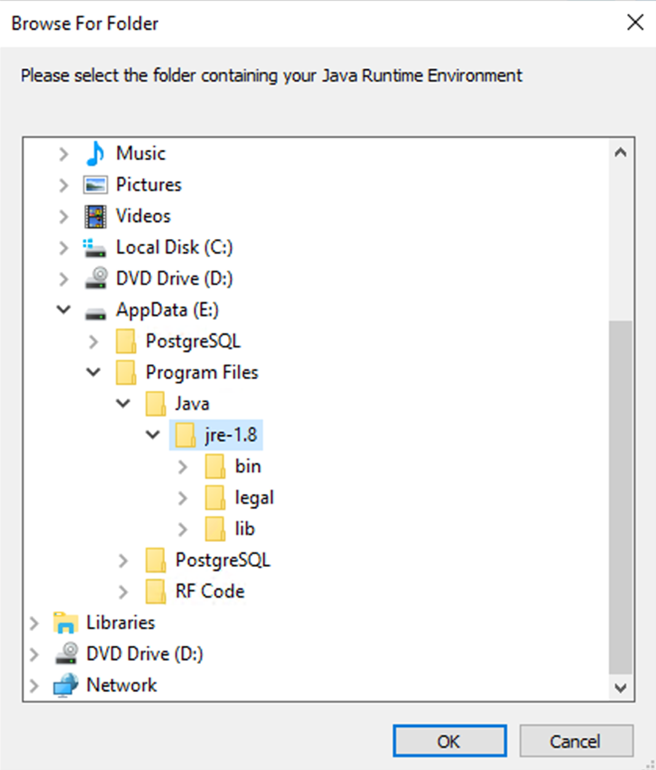
- When Using the NO JRE option select the directory where Java is installed. This option will not appear if using the packaged JRE distribution
Verifying the Install on Windows
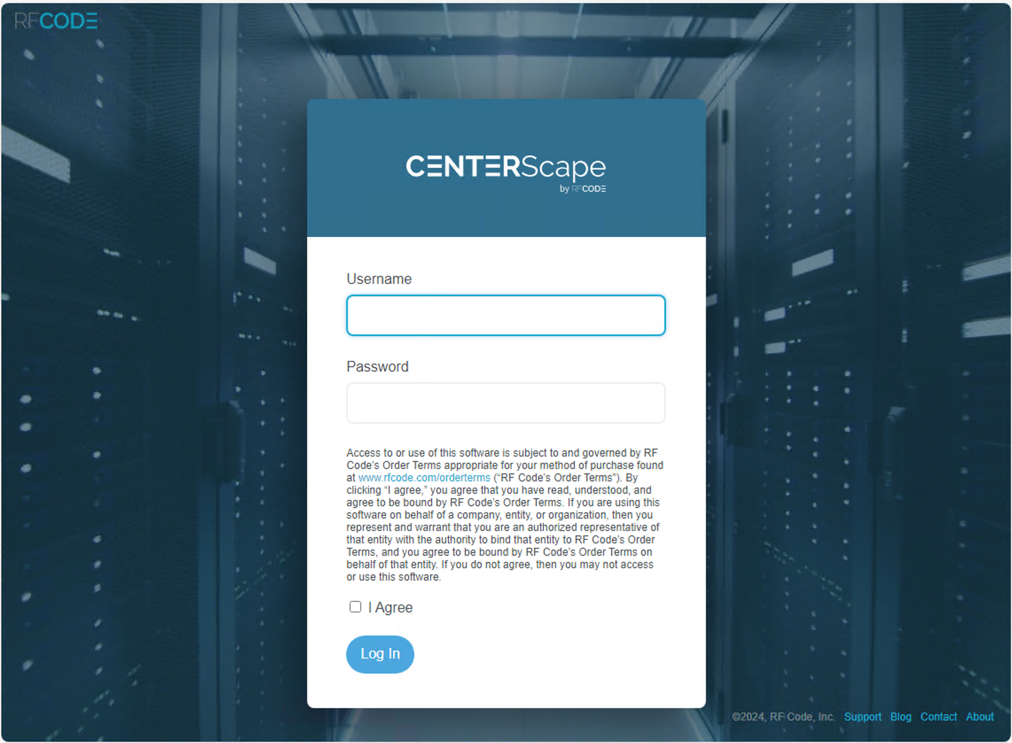
Use the desktop shortcut or if Internet Explorer it the default web browser, use Edge or Chrome to use http://localhost:6580 in the address bar. This should bring up the following web page. The license must be agreed to and the default username and password is admin/admin.
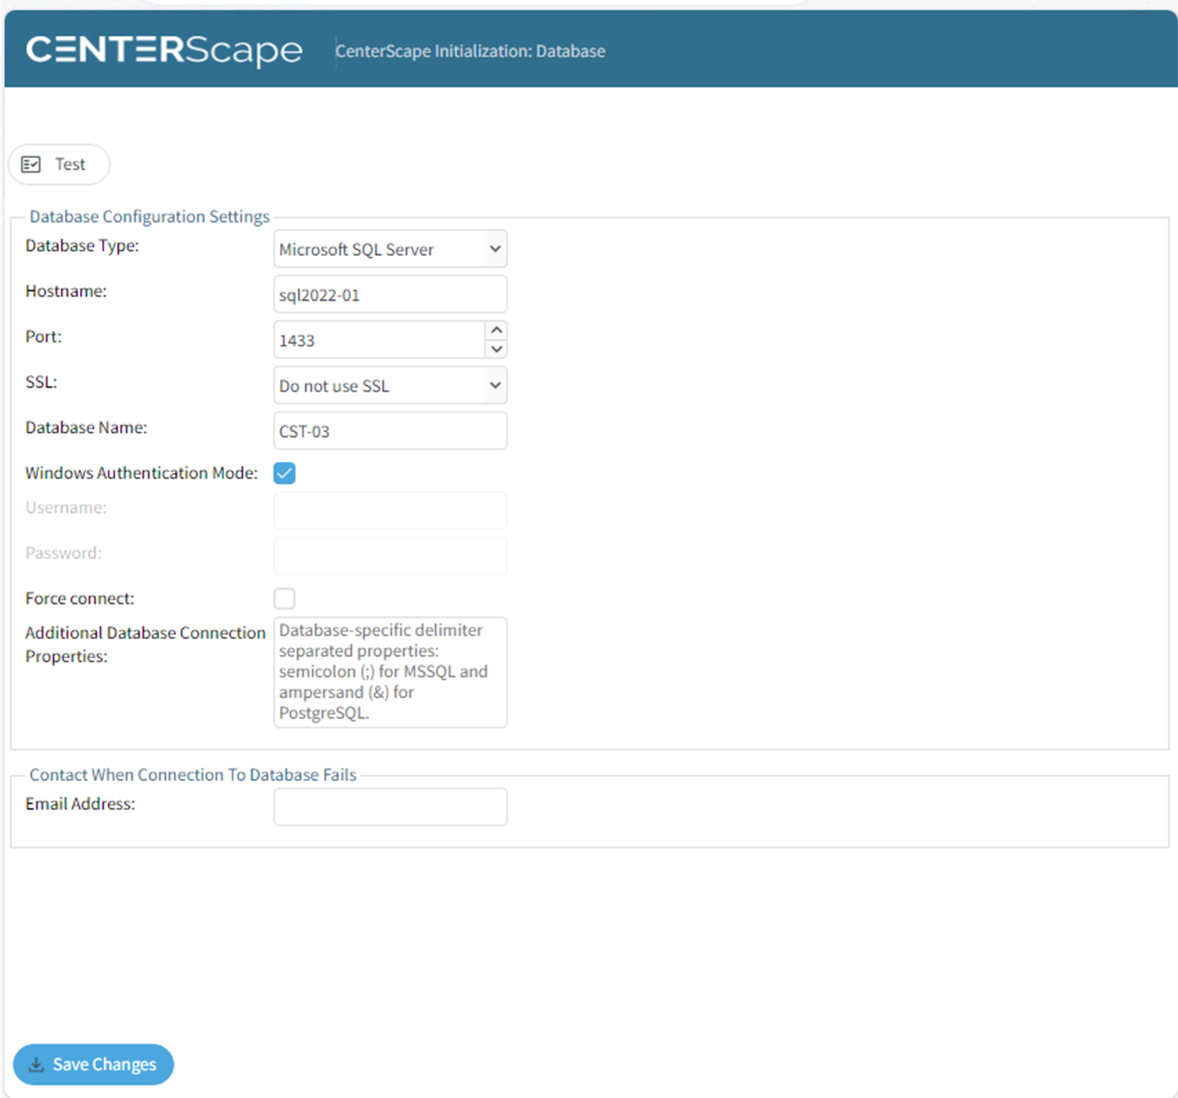
The database configuration screen should appear, and the application is now ready to connect to an empty database or a previously used CenterScape database.
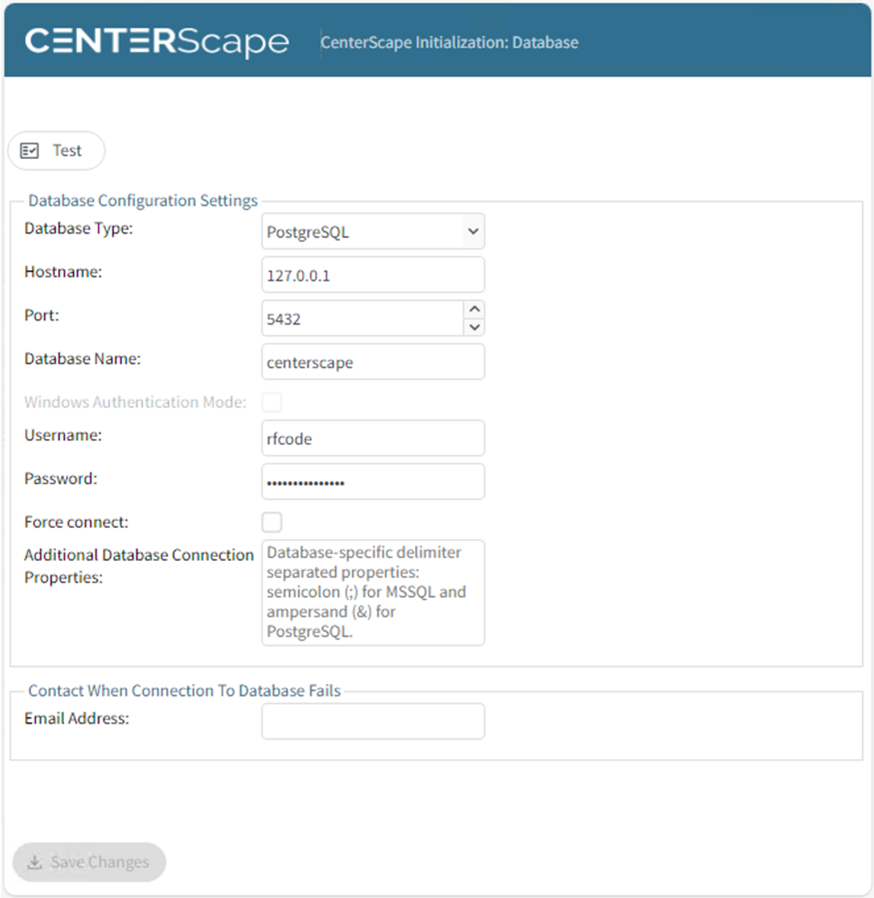
Connecting CenterScape to the Database Server from Windows Install
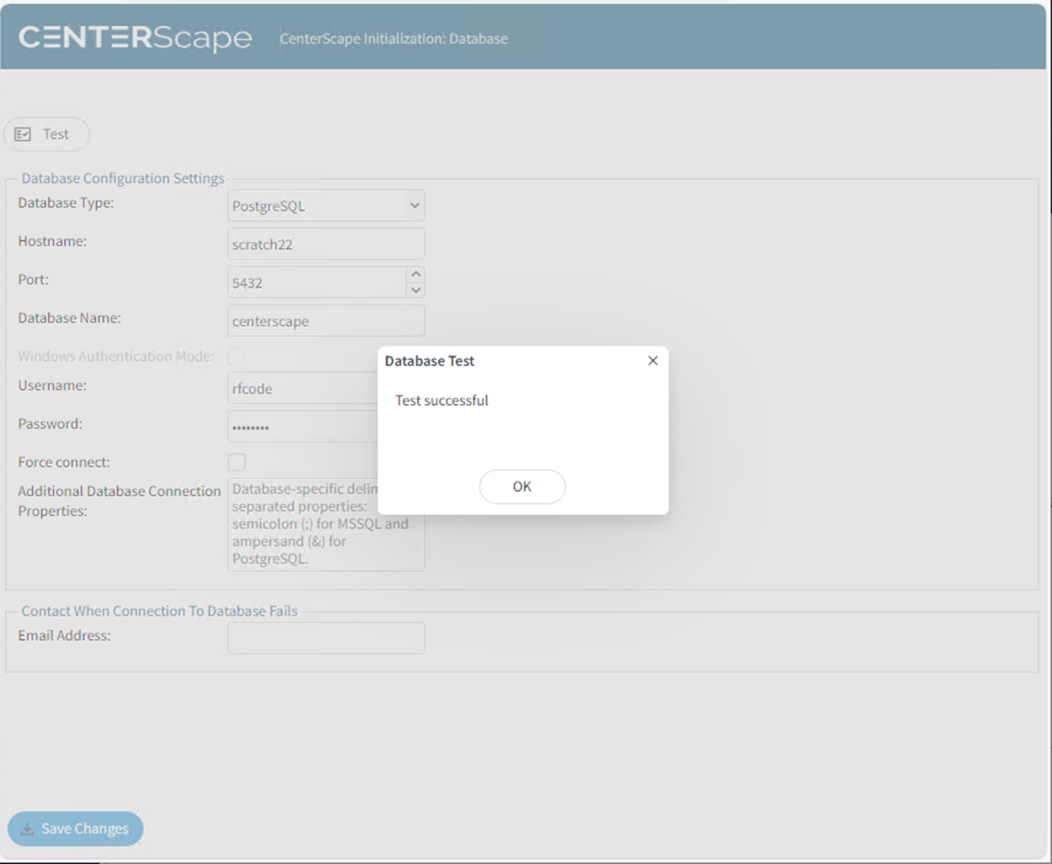
For SQL Server Authentication or PostgreSQL the form can just be filled out with the proper connection information. Once the information is entered click the test button to check the connection. If the test returns as successful, then settings can be saved and the application server will restart and automatically populate the database. Click save changes to save the settings and restart the application server with the new database.
Note: A message may appear in CenterScape Versions prior to 1.12.0 that the force connect box must be checked. This means that the previous or current CenterScape application server connected to this database from a different instance. If force connect is used the Application Server will take over the database and if there is another CenterScape application server currently connected it will be disconnected and placed in standby state. For versions after 1.12.0, if another CenterScape application Server is primary whether currently active or not, then the new install will be assigned as a standby server. It can be promoted to primary at the next login.
Note: If an encrypted database connection is needed and a non-public encryption certificate is used, the keystore must be updated with an enterprise trust certificate that will authenticate the certificate of the database.
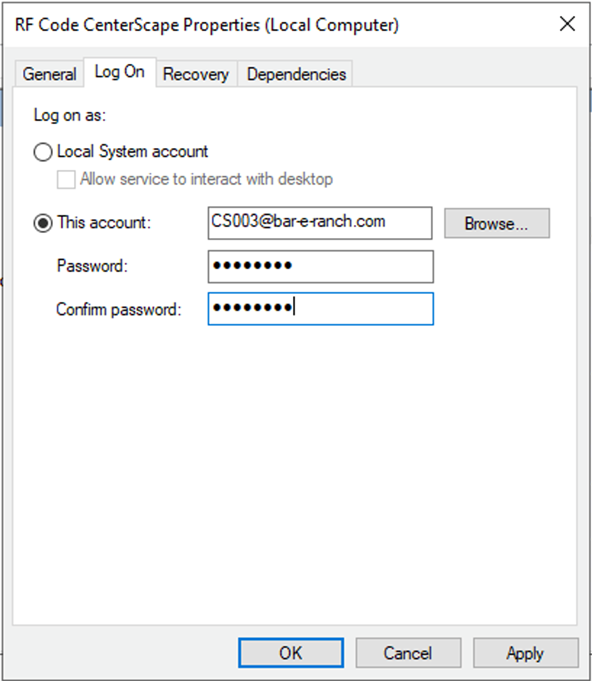
For Windows Authentication using SQL Server the process is different. The account that runs CenterScape must be the account that has access to SQL Server. By default, CenterScape will run under the windows local system account. To modify this use the following procedure.
- Stop the RF Code CenterScape Service using the Windows Services Manager
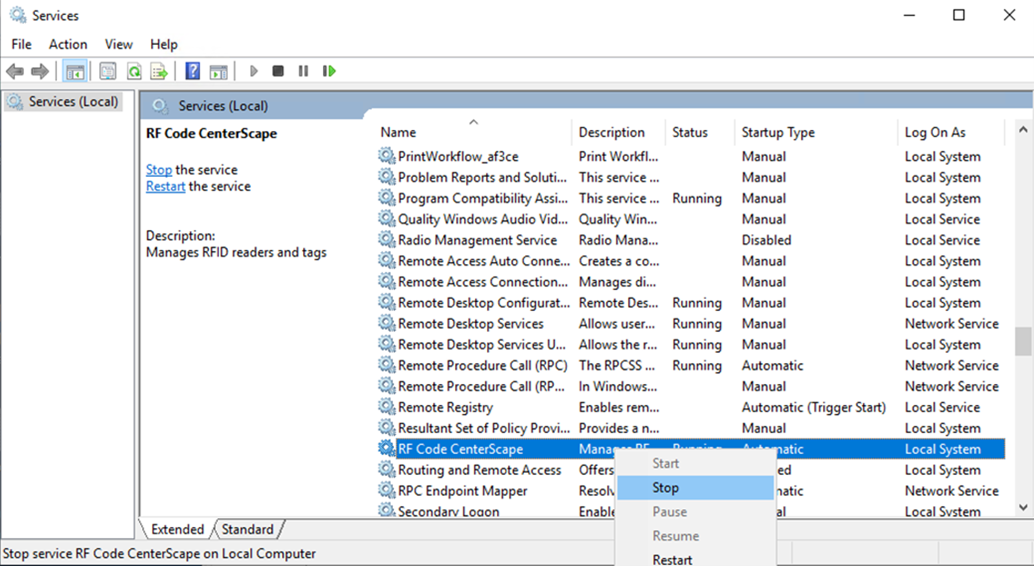
- Go into the Service Properties
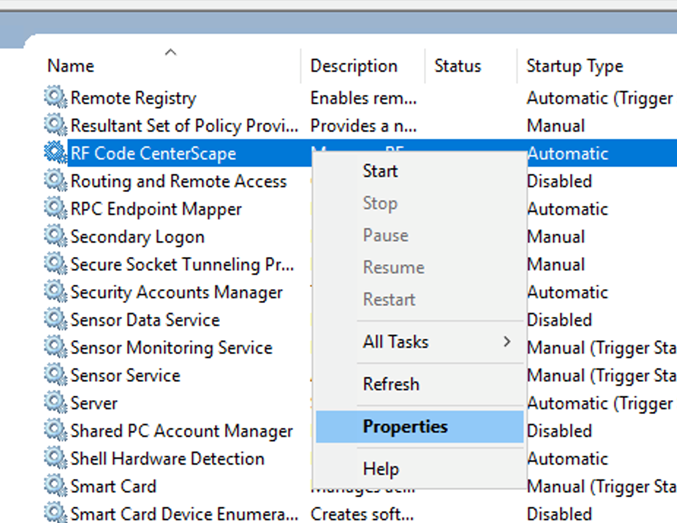
- In the login tab change the account to the service account with SQL Access.
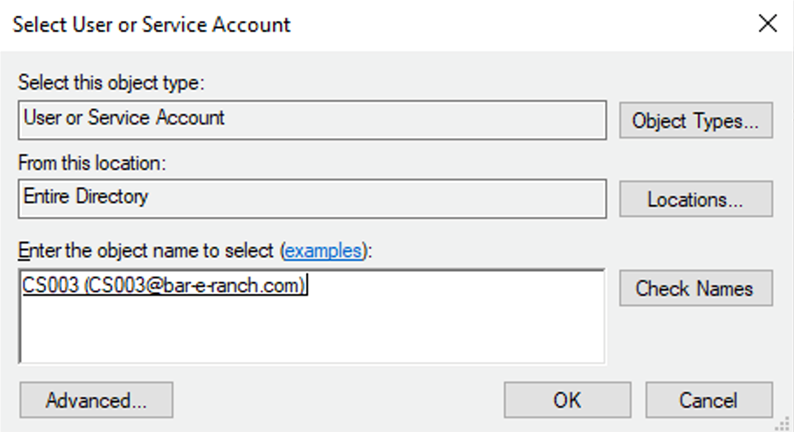
- Be sure to provide the password for the account here. This login is what will give the CenterScape its Kerberos token to authenticate to SQL Server.
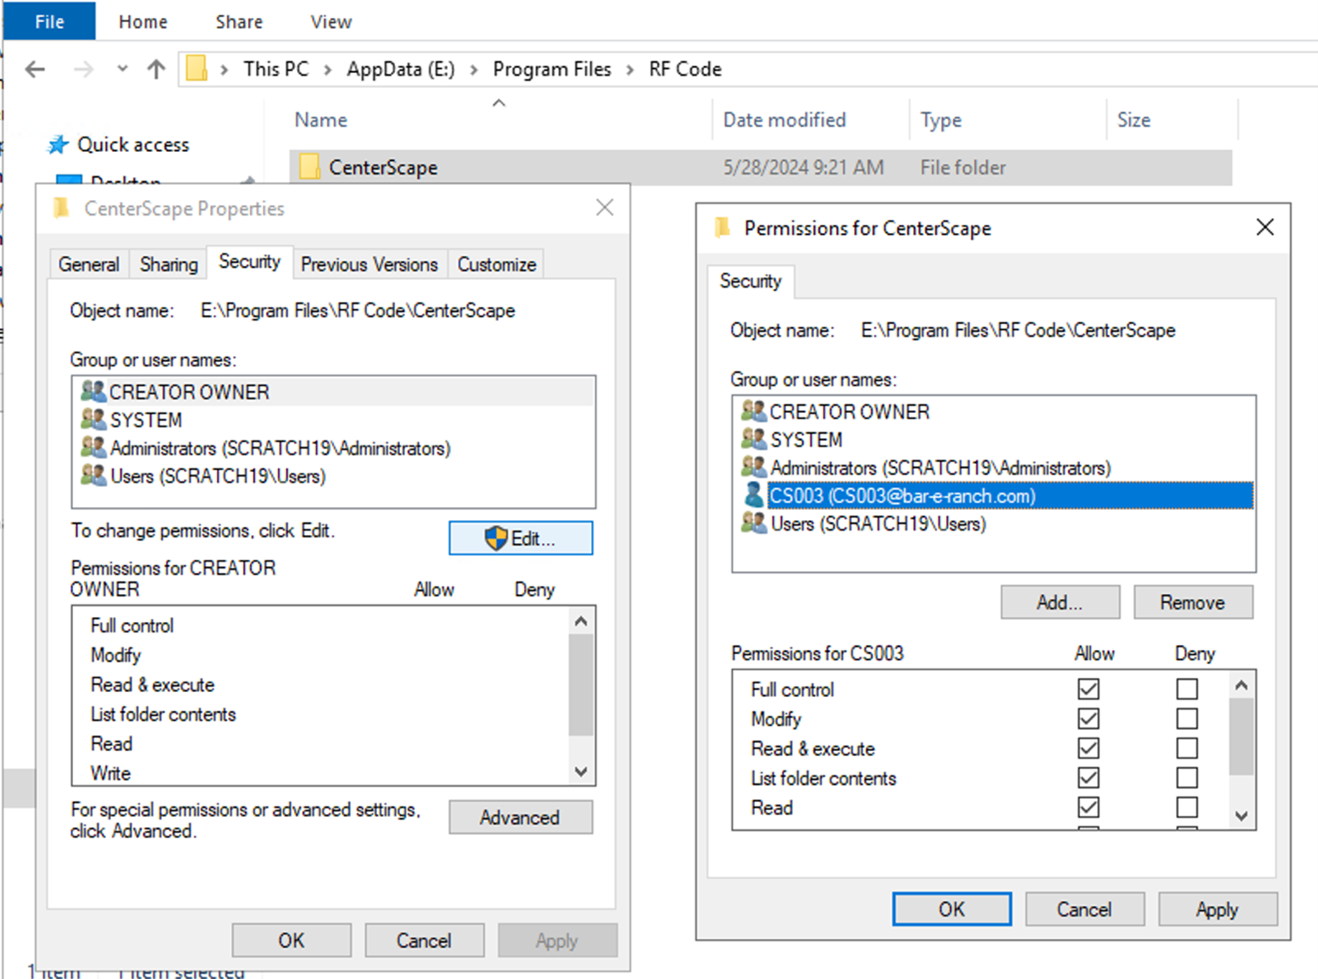
- With windows file manage grant full control of the installation directory to the Service Account so that it may reader, write, delete, and modify files in the software directory. File system errors will occur if this is not done.
- Start the Service and login to the web UI. Enter the database parameters and check the “Windows Authentication Mode” box. No username or password will be needed since the Service itself has the identity and rights of the service account. Test and then save the Changes.
- The install is complete when logging into the web interface brings the license key administration console.
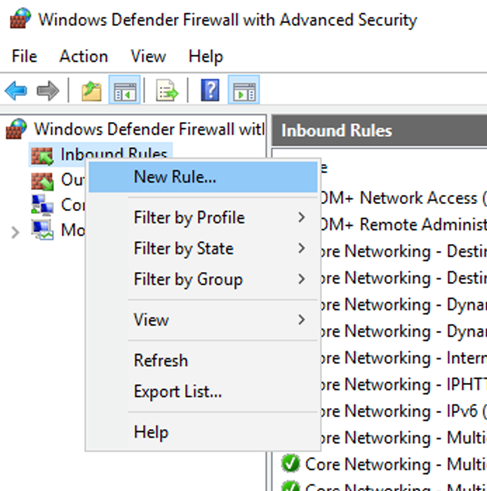
Post Installation Windows Firewall Configuration
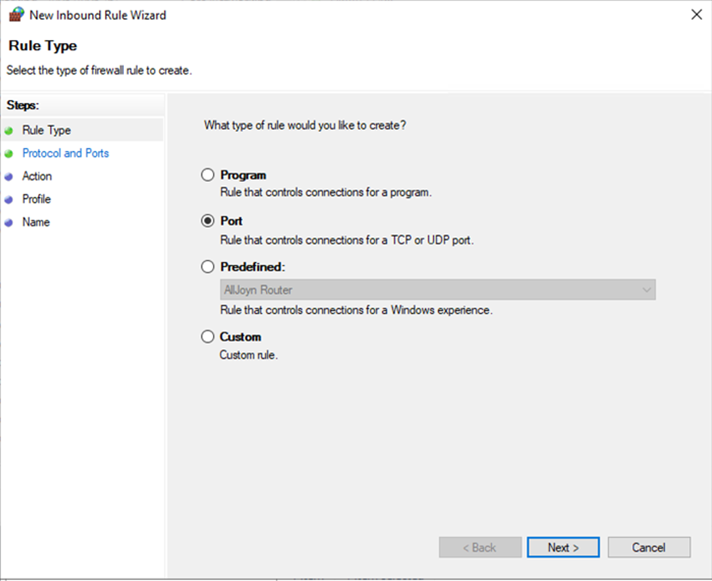
CenterScape is a multi user web based application that is used and administered mainly through the web interface. If windows firewall or any firewall is used on the server then ports must be opened to allow users to access the server. This procedure will cover the configuration of Windows Firewall, if other software is used the configuration will be similar. In the Windows Defender Firewall with advanced Security MMC create a new rule.
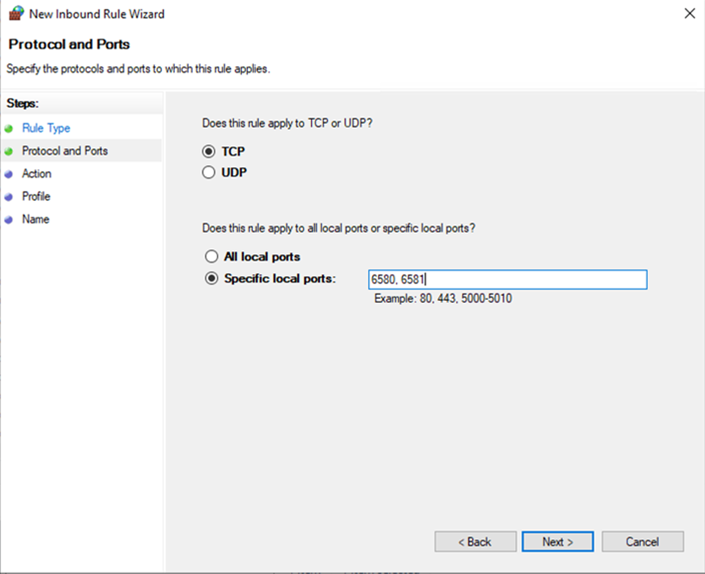
- Choose port based and include 6580 and 6581. If other ports like 80 or 443 are needed then enter those. The web service port can be changed in the CenterScape UI. If unencrypted HTTP is not desired, only include the encrypted port on the firewall rule.
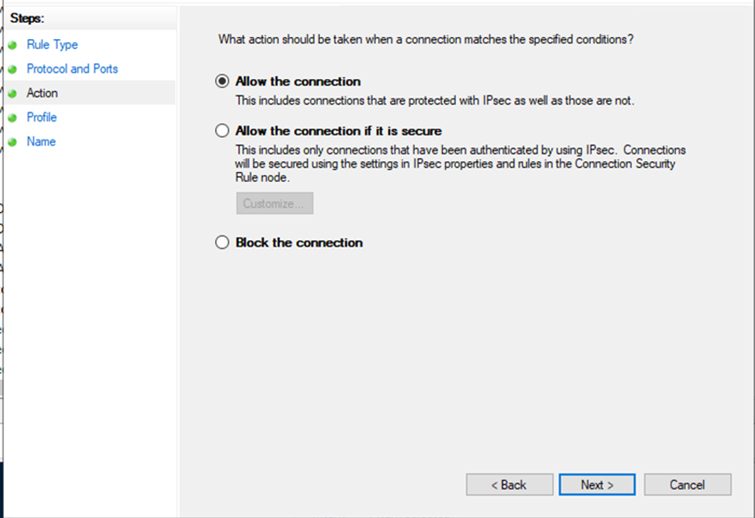
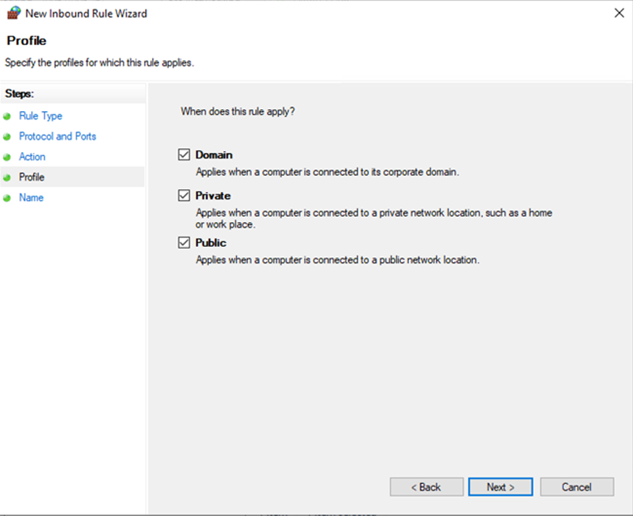
- Select Allow the Connection and the appropriate profile.
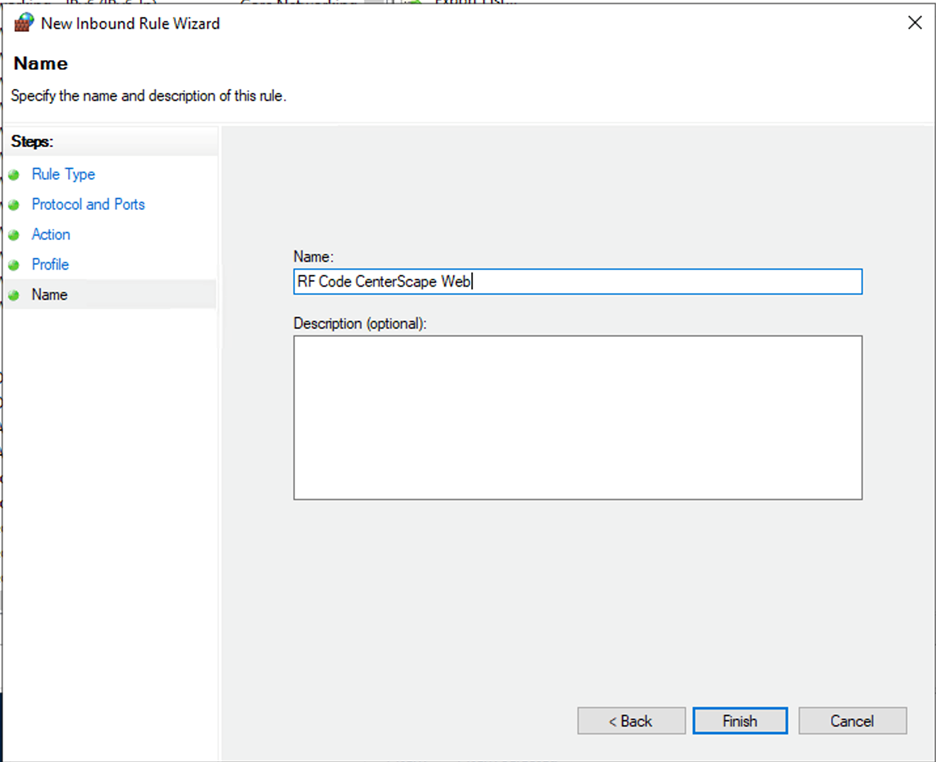
- Name the rule. RF Code CenterScape Web is a suggested name, but any name should be adequate.
- Click finish to complete the rule.